The Linux shell can be replaced with zsh to open up a world of extra plugins, features and themes. And it’s a pretty nice UX/UI upgrade from bash tbh.
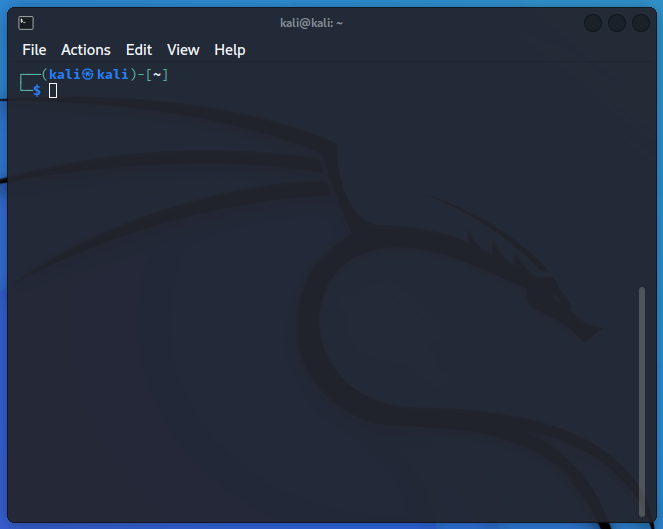
My zsh shown below, has been complimented with oh-my-zsh and the p10k theme with customised prompt elements.
The left-side prompt elements are: battery (86%), os_icon (ElementaryOS), dir, disk_usage (8%).
The right-side prompt elements are: status (exit status 0), load (load average 1.11), time (11:02:59).
There are other prompt elements available and they are listed at the end of this post. Have fun!
Your mileage may vary between different terminals, e.g. blackbox, gnome-terminal etc. Try opening alternative terminal emulators once zsh is set up to see the differences if any, and just stick with the one that works best for you.
Installation
sudo apt-get update && sudo apt-get install zsh git

chsh -s $(which zsh)

sh -c "$(curl -fsSL https://raw.githubusercontent.com/ohmyzsh/ohmyzsh/master/tools/install.sh)"

mkdir -p ~/.local/share/fonts

cd ~/.local/share/fonts

curl -fLo "MesloLGS NF Regular.ttf" https://github.com/romkatv/powerlevel10k-media/raw/master/MesloLGS%20NF%20Regular.ttf

curl -fLo "MesloLGS NF Bold.ttf" https://github.com/romkatv/powerlevel10k-media/raw/master/MesloLGS%20NF%20Bold.ttf

curl -fLo "MesloLGS NF Italic.ttf" https://github.com/romkatv/powerlevel10k-media/raw/master/MesloLGS%20NF%20Italic.ttf

curl -fLo "MesloLGS NF Bold Italic.ttf" https://github.com/romkatv/powerlevel10k-media/raw/master/MesloLGS%20NF%20Bold%20Italic.ttf

fc-cache -fv

In your terminal of choice, replace the default font with "MesloLGS NF"
You could also try Cascadia Code Nerd Font or some of the others listed here
Install oh-my-zsh
Install oh-my-zsh to enable a framework that allows easy customisation of zsh.
sudo apt install curl wget

sh -c "$(curl -fsSL https://raw.github.com/ohmyzsh/ohmyzsh/master/tools/install.sh)"

Use the omz command to administer oh-my-zsh
After modification to the ~/.zshrc file, reload the config with,
source ~/.zshrc
When you first run the shell with the p10k theme installed, there is no config file set up, so a convenient wizard will automatically ask you some questions. More on the wizard here, but it’s fairly self-explanatory.
p10k has a number of customisable prompt elements. You will be prompted by a wizard upon first execution of the theme and it will run through various options/choices to create the .p10k.zsh config file sourced by your .zshrc file.
vi ~/.p10k.zsh and edit the left and right prompt elements contained in the following two sections.
typeset -g POWERLEVEL9K_LEFT_PROMPT_ELEMENTS=(
os_icon
dir
vcs
...
)
typeset -g POWERLEVEL9K_RIGHT_PROMPT_ELEMENTS=(
status
command_execution_time
background_jobs
...
)
After any changes,
source ~/.p10k.zsh
Add syntax-highlighting, auto-suggestion and auto-correction
git clone https://github.com/zsh-users/zsh-autosuggestions ${ZSH_CUSTOM:-~/.oh-my-zsh/custom}/plugins/zsh-autosuggestions
git clone https://github.com/zsh-users/zsh-syntax-highlighting.git ${ZSH_CUSTOM:-~/.oh-my-zsh/custom}/plugins/zsh-syntax-highlighting
Auto-correctionexemptions
If you make a mistake, zsh will offer a correction. If you have certain commands or words that are repeatedly prompted with autocorrection options, you can add them to the exemption list in ~/.oh-my-zsh/lib/correction so those words will be ignored.
Find and edit the load plugins line in ~/.zshrc
plugins=(git zsh-autosuggestions zsh-syntax-highlighting)
source ~/.zshrc
If you're happy everything works, change your default shell in /etc/passwd for your user to /usr/bin/zsh permanently. This will not affect the root user when you sudo su - to elevate your privs to change to the root user for your system.
Lastly, for vi editing to work in zsh, you'll need to add the following line to your .zshrc file in your home directory.
bindkey -v
Prompt Elements
os_icon: Operating system icon.
dir: Current directory.
vcs: Version control system (e.g., Git status).
prompt_char: Prompt character.
status: Exit status of the last command.
command_execution_time: Duration of the last command.
background_jobs: Indicator for background jobs.
history: Command history number.
time: Current time.
date: Current date.
battery: Battery status.
user: Current user.
hostname: Hostname of the machine.
ip: IP address.
load: System load.
disk_usage: Disk usage.
ram: RAM usage.
swap: Swap usage.
cpu: CPU usage.
kubecontext: Kubernetes context.
node_version: Node.js version.
python_version: Python version.
ruby_version: Ruby version.
go_version: Go version.
php_version: PHP version.
java_version: Java version.
aws: AWS profile.
azure: Azure account.
gcloud: Google Cloud account.
terraform: Terraform workspace.
nix_shell: Nix shell.
context: Context (e.g., user@hostname).
Did you like this? Tip cyberfella with Cryptocurrency
Running Kali as a daily driver is doable since it’s Debian Linux, but is it suitable or really necessary. No. Not really. You should have a dedicated laptop for running it and only run it to use the tools when ethical or approved to do so.
But there are some features in the Kali UX that you might want to see in your daily driver distro.
One of these features for me is the zsh prompt. I really like the Kali prompt but I use bash.
To make your Linux bash prompt look like the zsh one in Kali Linux, you need to customize the Bash prompt by modifying the .bashrc file in your home directory. The Kali Linux terminal prompt is typically configured to display the username, hostname, and current working directory with specific colors and formats. Here’s how you can achieve a similar look:
Open the Terminal: Open your terminal on your Linux distribution.
Edit the .bashrc File: Use a text editor to open the .bashrc file in your home directory. You can use nano, vim, or any other text editor you prefer. Here, we will use nano:
nano ~/.bashrc
Modify the PS1 Variable: Find the line that defines the PS1 variable. It might look something like this:
PS1=’${debian_chroot:+($debian_chroot)}\u@\h:\w\$ ‘ Comment it out (never delete anything!) with a hash and replace it with the following configuration to mimic the Kali Linux prompt:
Note: You can limit the number of components in the working directory path by setting the PROMPT_DIRTRIM environment variable in your ~/.bashrc file. This is worth doing if you work with exceptionally deep directory paths.
Here’s what each part of this configuration does:
[\033[01;32m]: Sets the color to green. \u: Displays the username. @: Adds the “@” character. \h: Displays the hostname. [\033[00m]: Resets the color. :: Adds a colon character. [\033[01;34m]: Sets the color to blue. \w: Displays the current working directory. [\033[00m]: Resets the color. \$ : Adds the dollar sign for normal users or a hash for the root user, followed by a space. Save the Changes: Save the changes in nano by pressing Ctrl+O, then Enter, and exit by pressing Ctrl+X.
Apply the Changes: To apply the changes you made to the .bashrc file, either close and reopen the terminal or source the .bashrc file:
source ~/.bashrc After completing these steps, your terminal prompt should look similar to the one in Kali Linux, displaying the username, hostname, and current working directory with the specified colors.
This cool little website allows you to generate custom PS1 prompts for bash that contain just the elements you want. Alternatively, just install zsh and enjoy the additional features that come with it.
Did you like this? Tip cyberfella with Cryptocurrency
Consider this a crash course in working with QR codes on Linux.
A QR code is an image that represents a URL. It can be quickly and conveniently scanned by the camera on a mobile device to open the link, rather than having to type it in manually.
Here are some Linux commands that everyone should be familiar with. In fact, you could argue that these are the first commands to memorise and build out your repertoire from there.
#BASIC LINUX COMMANDS

#Clear the terminal window
  clear
#Show kernel version
  uname -a
#Show all tunable kernel parameters in the /proc/sys directory
  sudo /sbin/sysctl -a
#Set a kernel parameter on the fly without persistence
  sudo /sbin/sysctl -w kernel.sysrq="1"
#Set a kernel parameter with persistence
  /etc/sysctl.conf
#Kernel parameters startup script
  /etc/rc.d/rc.sysinit
#Show network interfaces
  ifconfig
  ip addr show
#Configure network interface with persistence
  /etc/sysconfig/network
  /etc/sysconfig/network-scripts/ifcfg-eth0
#Show all filesystems and space
  df -ah
#Show service status
  service udev status
  systemctl status udev
#How much disk space is used by a given directory
  du ~/Downloads
#What TCP and UDP ports is the listem listening on?
  netstat -tulpn
  sudo netstat -tulpn #gives more info on process name
#Show information about a given process
  ps aux | grep containerd
#Show free memory stats
  free
#List block storage devices known to the system
  lsblk
#Show mounted storage devices
  mount
#Show filesystems that should be mounted at boot
  cat /etc/fstab
#Mount everything in /etc/fstab
  mount -a
#Mount a block storage device
  mount /dev/sdb1 /mnt
#LVM Commands
  pvdisplay pvcreate  pvremove  pvchange
  vgdisplay vgcreate  vgextend  vgremove  vgchange
  lvdisplay lvcreate  lvextend  lvremove  lvchange
  mkfs.ext4
#Copy files
  cp
  rsync
  dd
#Show command history
  history
#Look up a command
  man -k <search-string>
  man grep
Did you like this? Tip cyberfella with Cryptocurrency
It’s come to my attention recently that despite a fresh install of Linux Mint, certain programs seem to leak like a basket and hang around after they’re closed too.
I’d noticed my machine freezing intermittently and adding the memory monitor panel item revealed that the system memory was filling up.
The blue mem bar fills up over time when Brave is left open. Disappointing for such an otherwise excellent Web Browser.
xreader and brave seemed to be the main culprits but since rebuilding my desktop machine, I’ve not been using many other programs apart from ledger live to track the value of my crypto currency portfolio while the fed prints money ad infinitum during the coronavirus pandemic. I digress.
Killing processes gets old really quick, so I wrote a quick’n’dirty little shell script to do it for me. Rather than killing individual processes, it savages all processes by the same name.
I shall call it savage.sh and share it with the world, right here. Not on github.
Killing all running processes for ledger and brave using savage.sh
#!/bin/bash
# savage.sh finds all process ID's for the specified program running under your own user account and kills them
# in order to free up system resources.  Some programs have severe memory leaks and consume vast amount of RAM and
# swap if left running over time.
#
# Usage: savage.sh
#
# Written by M. D. Bradley during Coronavirus pandemic, March 2020

#Variables
user=`whoami`
memfree=`free | grep Mem | awk {'print $4'}`
#Code
echo "Program to kill e.g. xreader?: "
read program
pidcount=`ps -fu $user | grep $program | awk {'print$program'} | wc -l`
ps -fu $user | grep $program | awk {'print$2'} | while read eachpid; do
	kill $eachpid >/dev/null 2>&1
done
memfree2=`free | grep Mem | awk {'print $4'}`
freedmem=$(( memfree2 - memfree ))
if [ $pidcount -eq 1 ]
then
	echo "Found $pidcount process running for $program"
	echo "Killed it.  Freed up $freedmem bytes."
fi
if [ $pidcount -gt 1 ]
then
	echo "Found $pidcount processes running for $program"
	echo "Savaged them. Freed up $freedmem bytes."
fi
Did you like this? Tip cyberfella with Cryptocurrency
Distributed Version Control System (VCS) for any type of file
Co-ordinates work between multiple developers
Tracks who made what changes and when
Revert back at any time
Supports local and remote repositories (hosted on github, bitbucket)
It keeps track of code history and takes snapshots of your files You decide when to take a snapshot by making a commit You can visit any snapshot at any time You can stage files before committing
INSTALLING git sudo apt-get install git (debian) sudo yum install git (red hat) https://git.scm.com (installers for mac and windows) gitbash is a linux-like command cli for windows
CONFIGURING git git config –global user.name ‘matt bradley’ git config –global user.email ‘matt@cyberfella.co.uk’ touch .gitignore echo “log.txt” >> .gitignore Add file to be ignored by git, e.g. log file generated by script echo “/log” >> .gitignore Add directory to be ignored, e.g. log directory
BASIC COMMANDS (local repository) git init Initialize a local git repository (creates a hidden .git subdirectory in the directory) git add Adds file(s) to Index and Staging area ready for commit. git add . Adds all files in directory to Staging area git status check status of working tree, show files in Staging area and any untracked files you still need to add git commit commit changes in index – takes files in staging are and puts them in local repository git commit -m ‘my comment’ Skips git editing stage adding comment from command. git rm –cached removes from staging area (untracked/unstaged).
BASIC COMMANDS (remote repo) git push push files to remote repository git pull pull latest version from remote repo git clone clone repo into a local directory
git clone https://github.com/cyberfella/cyberfella.git clones my cyberfella repository
git –version shows version of git installed
BRANCHES git branch loginarea creates a branch from master called “loginarea” git checkout loginarea switches to the “loginarea” branch git checkout master switches back to the master branch version git merge ‘loginarea’ merges changes made to ‘loginarea’ files in loginarea branch to master branch
REMOTE REPOSITORY https://github.com/new Create a public or private repository Shows the commands required to create a new repository on the command line or push an existing repository from the command line
README.md A readme.md (markdown format) file displays nicely in github.
Desktop distro’s have wonderful graphical disk space analysis programs such as Baobab (KDirStat), QDirStat, xdiskusage, duc, JDiskReport and with your desktop distro being connected to the internet, even if you dont already have them installed, installing them from your repositories is easy. You can quickly drill down using these treemapper programs and find the culprit for filling your disk up.
In the datacentre, things are never so easy. You have no internet access, and no local repository configured, and even if you did, you have no change control to install it on a live system, and even if you did, no GUI to view it. All you have is a production problem, a stressed out ops manager and a flashing cursor winking at you -oh and native tools.
Sure, you can use the find command to go looking for files over a certain size,
find ./ -type f -size +1000000M -exec ls -al {} \;
removing a zero and re-running as required until it starts finding something, but you’ll fight with the find command syntax for 15 minutes trying to get it to work, only to be unconvinced of the results. As good as find is, it’s not exactly easy trying to put together a command that does something that should be simple.
Here is a much simpler solution. Just use du. In particular…
du -h –max-depth=1
This will summarize the size of the top level sub-directories underneath your present working directory. You then cd in to the biggest one, run it again and repeat until you basically end up digging down and arriving at the largest file on disk – in my case a 32GB mysql database in /var/lib/mysql/zabbix.
So there you go. Have a play with it and you’ll see what I mean. It’s my favourite way of finding out what’s eating all my disk space.
Using QDIRSTAT on headless servers
We live in strange times, where despite the best efforts of the likes of Edward Snowden to open our eyes to the fact that we’re being monitored at any and every opportunity by the intelligence community, we’re still hell bent on moving our enterprise computing into huge corporate cloud data centres that the CIA and NSA have back doors into. If you think “That’s OK, I have nothing to hide.” then great. How ’bout you hand me your phone and let me go and have a good look around it? Oh, that’s not OK? Well make your mind up, will you?You think you’re gonna be as successful as Google and Amazon if you use their cloud services? Whose cloud service do you think they use? That’s right, their own. So your Cloud is their On Prem. I know, I’m such a cynic.
For those who are tasked with monitoring disk space consumption on their cloud servers, containers, headless stuff, you can use a neat little qdirstatcache file writer to generate a cache file that you can then open in qdirstat on your workstation for analysis.
I’ve summarised its use below, assuming you’ll understand what each command is doing.
I’d like to issue a special thanks to Mike Schlegel in the comments section below for dragging me kicking and screaming into the 21st Century. I guess there’s still some of us out there who are clever enough to be working with Linux but stupid enough that we didn’t buy Bitcoin at 10$ back in 2012 when I started this blog.
Did you like this? Tip cyberfella with Cryptocurrency
Things are a little different between Centos/RHEL6 and Centos/RHEL7 when it comes to starting and stopping services.
Having grown up on /etc/init.d/ scripts, it’s enough of a challenge using service blah stop instead of /etc/init.d/blah stop, but I guess service blah stop was added to Centos/RHEL6 to simplify things.
And then systemd comes alone they go and change it. Way to go in terms of keeping things simple – even though it does bring some consistency across redhat and debian based distros going forward tbf…
Now it feels like every time I try to do something as simple as start and stop a service on a redhat based distro, Sod’s Law kicks in and I always get the command wrong, making me feel like a total noob, despite having rocked the command line for over 20 years.
As you can probably gather, I’m not a fan of the landscape changing (which is what drove me away from Windowz and into Linux in the first place – the longevity of the marketable skills set was better). In my defence, Linus Torvalds isn’t that happy about it either.
Hence this little post. A quick reminder on which command to use. Now I’ve written it, I won’t need it of course. Funny how the brain works, eh?
RHEL/CENTOS 6
chkconfig | grep zabbix – lists all services in all runlevels
chkconfig zabbix-agent off – toggle it on/off at startup
service zabbix-agent stop -stop the service
Do you need to find a file and then perform some action on it and get caught up in curly brackets, back slashes and syntax errors when you could swear “this command worked in the past?”. It’s one of the joys of Linux I guess, but quickly becomes tedious when you’re working against a problem and are under stress.
Here is a reference find command that works. I hope it helps. It’ll no doubt help me at some point (the entire purpose of my blog is to actually remind myself how to do half of this stuff from time to time).
sudo find ./ -name *.mkv -exec ls {} \;
Something I like to do is create shell functions in the .bashrc file in your home directory to simplify commonly used commands that are long to type and quite syntax sensitive.
This is a nice useful one that can be used to find any files that have the specified string anywhere in the filename. Just type f All to find any files with the word All occurring anywhere in the filename.
You could create other versions such as this one, that will find and remove files with a specified string in the filename – but I’d really not recommend it.
fr() { find ./ -name “*$1*” -exec rm {} \; }
Be sure to run man fr first to check that your shell function name isn’t the name of an existing binary on the system!
Did you like this? Tip cyberfella with Cryptocurrency